
Cake Recipe
How to make Pokeball Cake? 11 Perfect Steps To Complete
May
Like no one before me, I want to be the absolute best.I therefore felt it was time to take up the task of a Pokeball Cake when the Pokmon GO craze began. You’ve seen me overcome my sphere phobia with my ornament cakes, kettlebell cake, and BB-8 cake, but the Pokeball Cake’s distinctive design necessitated the use of an entirely new fondant technique. Let’s get going with cakepluss.com.
Ingredients for making Pokeball Cake
Salted white chocolate mud cakes (makes 2)
- 350g unsalted butter, chopped
- 450 g white chocolate
- Caster sugar, 300 g
- 5 g salt
- 350 ml milk
- Three big eggs
- 2 teaspoons vanilla extract
- 525 g of white flour
- Baking powder, 3 teaspoons
Golden sugar syrup
- Sugar, 1/4 cup
- ½ cup golden syrup
- 1 cup water
-
(or just use 1 cup sugar and 1 cup water)
Italian meringue buttercream
- 6 egg whites
- Caster sugar, 1 1/2 cups
- 450g unsalted butter
- 1 tsp vanilla extract (optional)
Additions to the recipe
- Black fondant icing (small amount)
- (Minimum) white fondant icing
- Violet, pink and red gel food colours
Tools
- 9-inch nonstick cake pan
- Cake scraper
- Offset spatula
How to make Pokeball Cake?
Step 1:
Weigh a sizable pot and record the result. Heat the milk, butter, sugar, salt, and white chocolate in a saucepan over medium heat. As the mixture becomes silky and smooth, stir to combine the chocolate and sugar and dissolve the sugar. The chocolate may need 20 minutes to completely melt. After removing from the heat, let the food cool for ten minutes. The melted chocolate mixture should be whisked into after the eggs and vanilla have been combined. Utilizing a whisk or spatula, whip the flour into the liquid ingredients after sieving them. It doesn’t matter if the batter has a few lumps.
Find the weight of your batter by weighing the saucepan once more and subtracting the empty weight. You don’t need to grease the tin if it’s non-stick. Place a 9-inch non-stick springform baking pan on the scales and pour half the batter into it. When a skewer is placed into the center of the Pokeball Cake, it should come out clean after 45 minutes of baking at 180C. Transfer to a rack to cool after 5 minutes of cooling in the pan. Repeat with the remaining batter after cleaning the tin.
Step 2:
Wrap the Pokeball Cake in aluminum foil and cling film when they are merely warm to the touch. Don’t store in the fridge; leave out overnight.
Step 3:
The components for golden sugar syrup are combined in a small saucepan and heated to a simmer while being stirred to dissolve the sugar. Remove any particularly tall domes from the Pokeball Cake if necessary, and then cover the entire surface with the golden sugar syrup.
Step 4:
Put the whisk attachment on a stand mixer’s bowl after wiping it down with a little vinegar on a paper towel to prepare the buttercream. Put the egg whites in a bowl, then in a small saucepan, combine the sugar and water. Use a candy thermometer to measure the sugar’s temperature to ensure it reaches 114C, or 110C if you’re using an induction stove. Here, though, you want the sugar to reach 121C just as the egg whites are beginning to form soft peaks. Induction will make that go much more quickly than gas or electricity.) In the stand mixer, start whisking the eggs right away at high speed.
Pour the sugar into the whisking eggs in a very slow, steady stream after it reaches 121C. bit continuing to whisk the eggs in the stand mixer until the metal bowl of the mixer feels cool to the touch, step away and carry out another task for a bit. It might take 30 to 40 minutes. The butter should now be sliced into 1-inch chunks.
Step 5:
Switch to the paddle attachment after stopping the mixer. Up until virtually all of the butter has been incorporated, add the butter one cube at a time.
Step 6:
I am receiving white buttercream. You should notice that the buttercream has changed from a bright white meringue to a yellow color after adding the butter. You need to add a little violet or purple food gel to offset the yellow. Before using all of the butter, spread a small amount of food gel—about the size of a matchhead—onto a piece of butter with a toothpick. When you add the butter, the yellow color should be neutralized. Add a bit extra violet gel if it still seems a touch too yellow. At this stage, if you’d like, you can flavor your buttercream by using vanilla or other extracts, or you can just leave it unflavored.
Step 7:
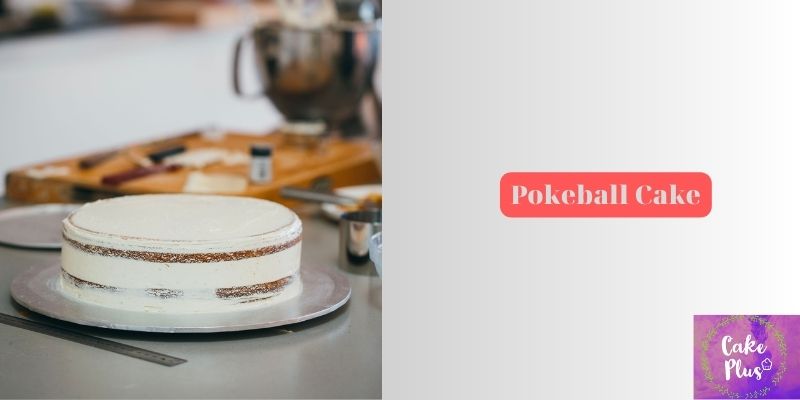
Press three tiny pieces of fondant into the base of your Pokeball Cake board. Place the cakeboard on a cake turntable, or a metal pizza tray if you don’t have one. Place a single cake on top, then spread a small amount of buttercream over the fondant. Place it in the center, then cover the top with a cup of buttercream. Stack the second cake on top, dome facing down.
Using an offset spatula and cake scraper, spread a thin layer of buttercream all over the Pokeball Cake, covering the top and sides thoroughly. This is referred to as crumb coating and functions as a kind of cake primer. To make the crumb coat more rigid, chill the Pokeball Cake for 20 minutes.
Step 8:
Divide the remaining frosting into equal pieces while the crumb coat is setting up. For the top half of the Pokeball Cake, save the white icing. Leaving one half in the mixer bowl, add enough pink food gel while beating on low speed to tint the Pokeball Cake a medium-deep pink. Starting with a pink base helps because it’s challenging to achieve a vibrant red using only red. To make the icing as red (or dark pink) as you can tolerate, add just enough red food gel. The red will deepen with time, so if you stop adding color when there is only the barest minimum, it will usually deepen to a level you are satisfied with.
Step 9:
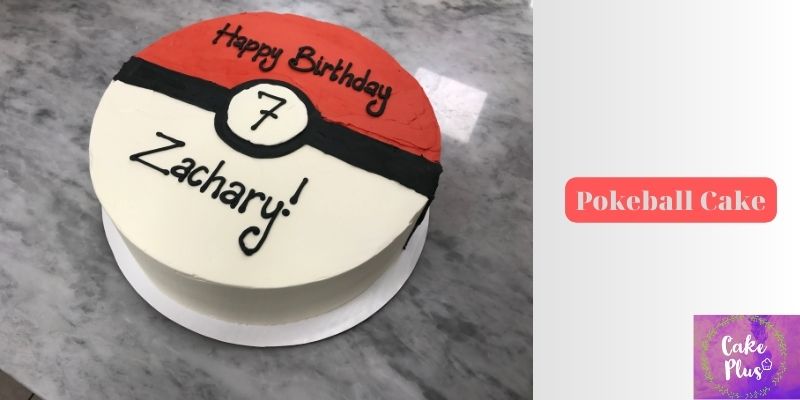
Spread red icing on half of the Pokeball Cake and white icing on the other, making sure the final coat is as smooth as you can. You definitely don’t want to mix the colors at this stage, so be careful. When you’re done coloring the red, wash your hands, spatulas, and other surfaces. You should also have plenty of paper towels on hand to wipe away any remaining red. The red and white halves don’t need to be touching because a black fondant strip will cover them. Save any icing that is left.
Step 10:
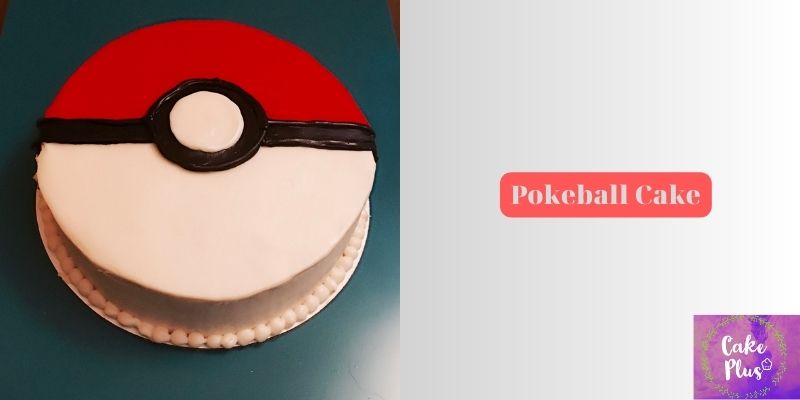
Roll out the fondant to a thickness of about 3mm on a board that has been lightly dusted with icing sugar. Two strips of black fondant, each about 2 cm broad and 20 cm long (enough to cover the cake halfway), were cut using a metal ruler. To divide the cake’s red and white halves, place the two bands down the middle. Trim the fondant to a flush fit with the cake board. So that it sits flush, press the fondant into the frosting.
Step 11:
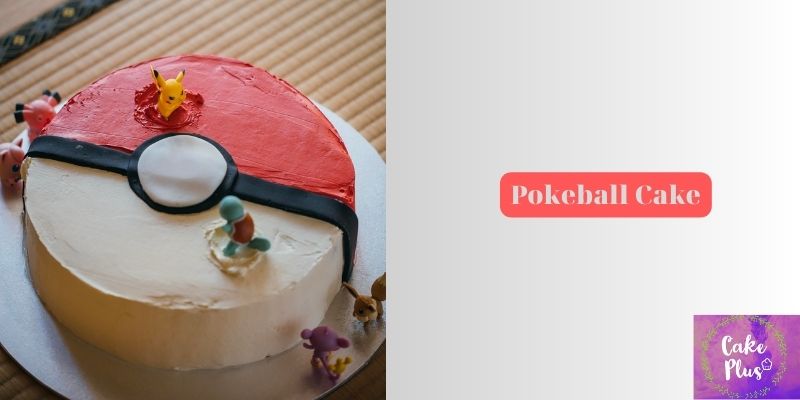
Put a circle of black fondant in the center of the Pokeball Cake using a round cookie cutter. In order to prevent black fondant from getting on your white fondant while rolling, wash your board and re-dust it with icing sugar. Using a smaller round cooking cutter, cut a smaller circle from a little sheet of white fondant that is about 3 mm thick, and place it inside the black circle.
Make a few little swirls with the remaining icing where you want to put your Pokemon figurines. You’re done when you place the figures on top. Do not refrigerate the Pokeball Cake; instead, keep it at room temperature (or about 18C). Please read the advice provided below since you could find a lot of it to be very helpful.