
Cake Recipe
Best Winnie The Pooh Baby Shower Cakes Recipes: 6 Steps To Make
May
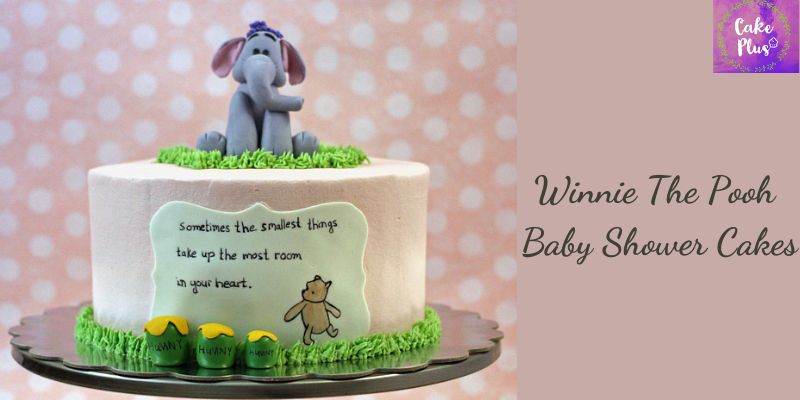
I attended a baby shower just before Christmas, so I figured it was about time I posted about this gorgeous Winnie The Pooh Baby Shower Cakes I made a couple of years ago. The baby shower season is upon us. I was quite pleased with the outcome, especially the Heffelump! It was much simpler than I anticipated, however I was a little nervous about trying to imitate the famous character. Cakepluss.com will show you some detailed directions for making Winnie The Pooh Baby Shower Cakes.
Ingredients:
- Your choice of frosting color for the cake
- Tip 233: Create “grass”
- Buttercream in green (also used for “grass”)
- Long wooden skewers or toothpicks in the colors white, gray, pink, purple, green, and black are used for fondant.
- circle cutters for paintbrushes
- Miniature cake dummy, a little rolling pin, and a small knife
- Tools for gumpaste (optional)
- Extruder for fondant (optional)
How to make Winnie The Pooh Baby Shower Cakes?
1. The makeup of Heffelump
I used purple fondant for the hair, gray fondant for the body, pink fondant for the inner ears, and a little bit of black fondant for the eyes to make the Heffelump. Start with roughly 50 grams of grey fondant to shape the body. Roll into a broad cylinder, then slightly reduce the width at the top so that it tapers. Tap the body’s top flat by using a flat surface. To give the head some support when I connect it, I stuck a toothpick into the body.
2. Create Legs and Arms
I used 10 grams of fondant apiece for the arms and legs. I rolled each into a log, tapering at the top, similar to the body, as seen in the image below. I gave the legs a slight curl so they could wrap around the body.
Use a little water to help the limbs and legs stick to the Heffelump body. Once the arrangement is perfect, cut the fondant into “fingers” and “toes” using a small pair of scissors. In order to move the Heffelump easily and eventually remove it once it had dried, I constructed it on a cookie sheet lined with parchment paper.
3. Make the Head and Trunk
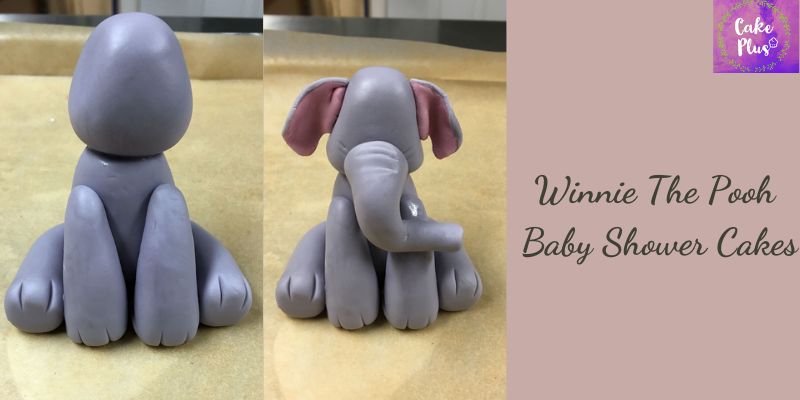
Using 25 grams of grey fondant, I then shaped the head. The head’s shape was challenging to achieve, but I basically began with a fondant ball and tapered the top. It was necessary to slightly flatten the sides because it is where the ears go. I used a small amount of water and the toothpick as a support to join the head to the body.
Another tapered log is required to create the trunk. I used 9 grams of gray fondant this time, and the log should be primarily thin with a wide top. The end of the trunk can be indented as indicated if you have a bulbous gumpaste tool. With a little water, bend the trunk across the arms to support it while you attach it to the head.
The ears presented some challenges. I thinly rolled out some pink and grey fondant and topped the gray with the pink. I then used a sharp knife to cut the ears freehand. It took a few attempts before I was comfortable with the shape and could roughly cut the left and right ears to the same size and shape. Here, you can use your imagination to make the ears as large or as small as you desire.
Before pinching the ears slightly and using water to secure them to the head, I slightly stretched the gray fondant over the pink at the top border. To add lines to the trunk and face, I used one of my gumpaste veining tools, but you could simply use a toothpick.
4. Add some details
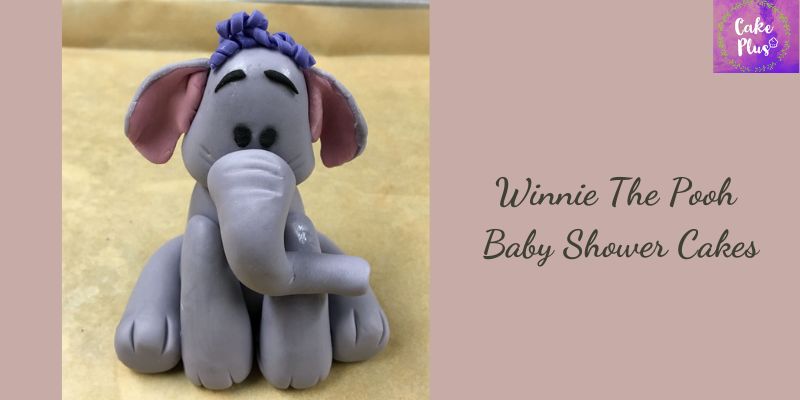
Just some hair and eyes are required for the finishing touches. If you don’t have a fondant extruder, you can just roll the fondant thin and cut a short strip with a knife. I used a fondant extruder to make very narrow strands of purple fondant for the hair. The fondant was then wrapped around a pin, and I let them dry to form curls. With a little water, secure the curls to the crown of the head.
Use a small amount of black fondant that has been shaped into a ball and then flattened into ovals for the eyes. I fashioned flattened, little, tapering cylinders out of black fondant for the eyebrows. It can be difficult to attach the eyes and brows, but using a toothpick or really little spatula to get them in place occasionally helps.
5. Put the plaque
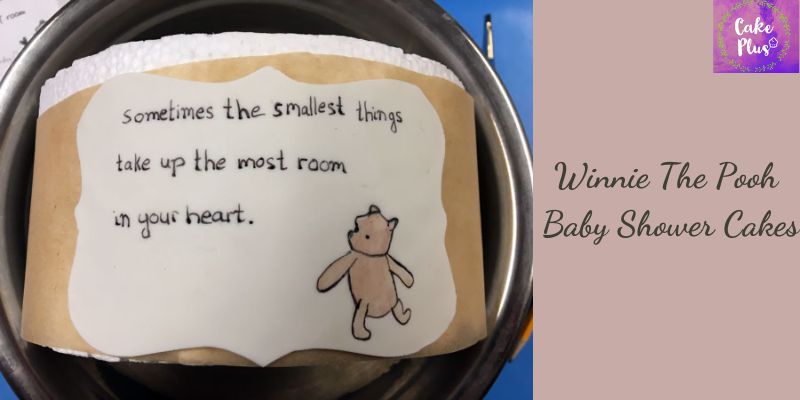
Although you could easily print up a plaque pattern and use it as a guide to cut the fondant, I used these fantastic Wilton plaque-shaped cookie cutters. I cut out the plaque from white fondant, rolled it out to approximately 1/8 inch thickness, and then laid it on a styrofoam circle that was almost the same size and shape as my finished cake.
I only did this because I wanted the plaque to dry with a curve and I was using a round Winnie The Pooh Baby Shower Cakes. You may simply dry the plaque flat if you create the Winnie The Pooh Baby Shower Cakes in a square shape. For support, I placed the Styrofoam ball inside a sizable mixing bowl.
When the fondant was dried enough to write on, I drew Winnie the Pooh and wrote the sentence using an edible marker. You can sketch and write by hand or use a pattern that you can print out and then transfer to the fondant as a guide. With a little powdered food coloring diluted with lemon extract, I painted in the Winnie the Pooh characters.
I used a dark green fondant that I shaped into a very short, thick log to create the honey pots, or hunny as Pooh calls it. Then I used a golden yellow fondant, rolled it out, and cut it into a very rough circle shape to create the “dripping honey.” I used a small amount of water to adhere the word “honey” before writing the word “hunny” using an edible marker.
6. Bringing everything together
All of the ornaments were adhered after I covered a round cake in a light pink buttercream frosting. After that, I piped a “grass” border around the Winnie The Pooh Baby Shower Cakes and the Heffelump using a tip #233 and green buttercream.