
Cake Recipe
How to make Pink Ombre Cake? The Best Guide For You
May
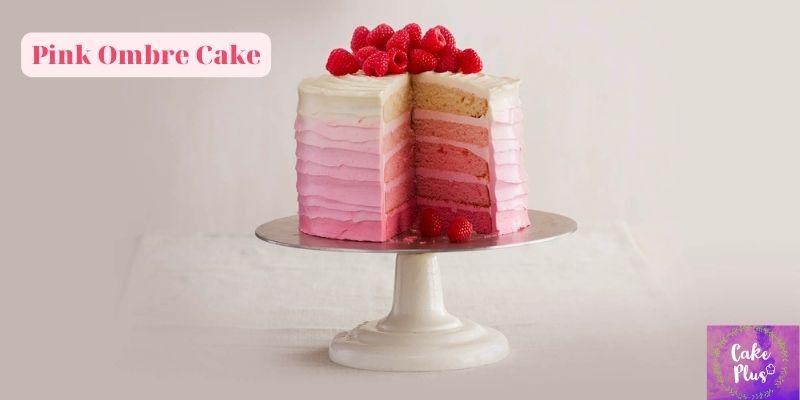
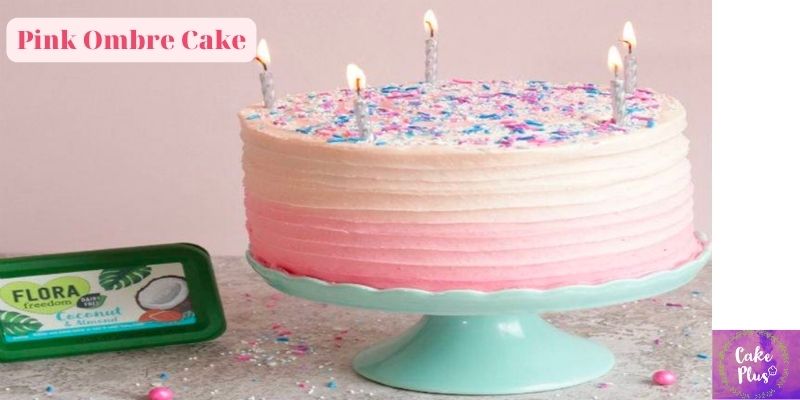
The Pink Ombre Cake is another version of the watercolor cake. The wonderful color of the ombre tone will make your monotonous cake more sparkling than ever. This is a dreamy color cake, very suitable for making a cute gift for girls, or as the centerpiece of a birthday party with sweet pink. With the recipe of Pink Ombre Cake is soft, light as cotton and sweet, combined with cream topping and glittering particles will probably be a simple, modern and sophisticated choice for you to try in the small kitchen. with flour, eggs, milk there! Let’s explored with us to learn how to make Pink Ombre Cake with cakepluss.com.
What is Ombre Cake?
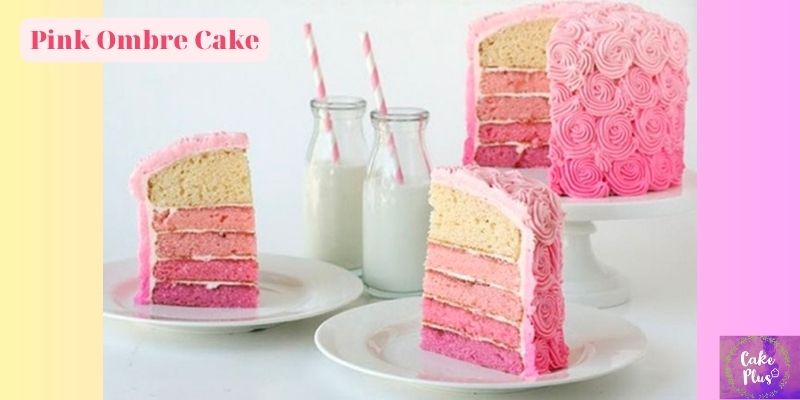
Pink Ombre Cake are cakes that have a gradient of colors from light to dark. The icing colors on the outside of cakes are often what this term alludes to, however individual cake layers can also be tinted to provide a gradient. Anyone can learn this enjoyable and simple frosting technique to give their cakes a lovely and stylish touch. Pink Ombre Cake cakes can be made in any flavor, shape, or size, but in order to achieve the desired effect, you need often use a layer cake because it provides a lot more frosting surface area.
How to make Pink Ombre Cake? Guide to make the cake and the ombre cream
1. Formula:
- 200g flour
- 170g sugar
- 10 eggs
- 40ml fresh milk
- 60ml vegetable oil
- 1 pinch of salt
- A few drops of lemon
- 1tsp vanilla essence
- pink food coloring
- 200ml decorative cream topping
2.How to do the Cake?
- Separate egg yolks and whites into 2 separate bowls. Beat egg yolks until foamy when large, add a pinch of salt and a few drops of lemon. Salt and lemon here are alkaline and acidic ingredients, which will work in place of tartar powder, making it easier for egg whites to stiffen.
- Continue to beat egg whites until small bubbles appear, then add sugar, gradually increasing the speed of the whisk, until the whites form stiff peaks.
- Add the egg yolks one at a time.
- Add fresh milk, cooking oil, and vanilla essence, mix well.
- Sift the flour into the egg mixture, dividing the flour evenly into 2 sieves to avoid lumps. Mix quickly and gently.
- Divide the flour mixture into 4 small bowls to blend the color from light pink to dark pink.
- Pour the colored dough mixtures into different molds (I used a 20x20cm square mold) lined with non-stick wax paper and put in the oven at 160 degrees Celsius for about 15 minutes.
- Once the cake is done, remove it from the pan and let it cool completely. Use a 10cm round cutter to cut the cake into small pieces.
- Whip cream topping. Pump the topping cream evenly between the cake layers and decorate the cake with colored sugar beads to make the cake more lively.
How to make Pink Ombre Cake Cream – The Perfect ombre?
Step 1: Prepare a pre-cut torte into circular layers. (Torte is the name for a pastry made with lots of eggs, sometimes ground grains are used in place of flour or as an addition to flour.)
Step 2: Cover the cake with a layer of vanilla buttercream.
Step 3: Choose your favorite color to create an ombre tone. For me, I put a layer of white buttercream on top. Place a piece of white buttercream on top of the cake.
Step 4: Using a polishing knife, smooth the butter layer on the cake. This white cream will make the ombre blend more wonderful.
Step 5: Choose the color palette to combine according to your preferences. Color the butter in about 4 different colors (about 1/3 – 1/2 cup of buttercream for each color). Feel free to create an amazing ombre color transition!
Step 6: Place your first color in a smooth round tip frosting bag. Starting at the bottom first, run a lap around the wheel. Similarly, do each round with different colored buttercream icing bags. Run from the bottom of the cake to the top of the cake, then stop.
Step 7: Once all the colors are fully arranged, start smoothing the buttercream. Using a smoothing knife perpendicular to the turntable, rotate the turntable slowly to remove excess buttercream, the buttercream will look smoother.
Step 8: Again use the serrated sander to smooth the buttercream, place the flat side on the cake and touch the bottom of the turntable, turn it around to smooth. Be careful not to leave any holes in the top of the cake, which will make the cake look ugly.
Step 9: Go back to step 7, smooth one last time so that there are no holes in the cake with a sander.
In just a few extremely simple steps, you have added the secret to decorating a cake with just a few layers of colored buttercream. This time the cake with a unique ombre tone will appear right on the stove if you apply my recipe.