Cake Recipe
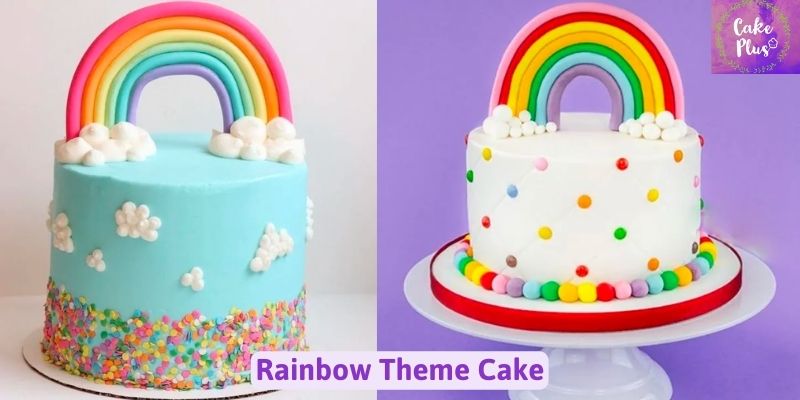
Celebrating with a Rainbow Theme Cake: A Symphony of Colors
Jun
You and your family will adore my easy and enjoyable Rainbow Theme Cake recipe as you celebrate the new year and holiday! These Rainbow Theme Cake are incredibly kid- and family-friendly, so I wouldn’t be shocked if one of them ended up being one of your new go-to recipes for celebrations like birthdays.
I enjoy making Rainbow Theme Cake that are inspired by rainbows because it’s enjoyable to come up with new ways to include the rainbow on or in the Rainbow Theme Cake. There are so many various approaches, and the combination of colors always results in a stunning cake! I look forward to seeing how you interpret these cakes and which one becomes your favorite. Here is the recipes of Cakepluss.com
Celebrating with a Rainbow Theme Cake: A Symphony of Colors
Ingredient you need:

- 2 white chocolate mud cakes, as directed in step 3 of the recipe.
- Around 300g (10 oz) White fondant that has already been created (we used a small 500g pack and still had extra).
- 1kg (2½ lb) prepared buttercream (this provides a color that is more intense than what can be obtained with conventional liquid food coloring)
- (Optional) 4 short wooden skewers
The Directions for making Rainbow Theme Cake
Step 1: A RAINBOW CAKE TOPPER MAY BE MADE.

The fondant was first divided into six balls. When it was light enough, we put a few drops of the paste coloring to each and worked it through the ball (much like playing with playdough). Although there are officially seven colors in a rainbow, we didn’t include indigo. Red, orange, yellow, green, blue, indigo (optional), and violet are the colors you need.
Then we sprinkled some over each color and incorporated it into the fondant. If you’re making a Rainbow Theme Cake topper that needs to stand up and support its own weight, you’ll need this powder to help the fondant set up particularly hard.
A small amount of each color of fondant was kept aside for the butterflies in step two. Then, in order to achieve an equal finish, we used a fondant smoother to roll each remaining color into a long sausage shape. To prevent the fondant from sticking to the bench, my buddy uses a silicone mat. (Using flour would destroy your colors, so you can’t.)
We arranged the colors in a row before bending them into an arch (pro tip: bend everything around a glass to make it even). Make sure the span of the arch is the same width as the Rainbow Theme Cake tin you’ll be using by measuring it.
Last but not least, we placed two wooden skewers—for a total of four—into the fondant on opposite side. This is done so that the Rainbow Theme Cake topper can be added to the cake afterwards. The cake topper was then set aside to cure for a few days so that it would harden. This component must be made in advance in order to avoid having a floppy rainbow that won’t stand up.
White fondant was used to cut out a few clouds, which we also set aside to dry. For your rainbow, you only need two firm clouds; the rest should be soft so they may curve along the sides of the cake. Make the soft clouds last. However, it’s a good idea to keep a few extras on hand in case one breaks.
Step 2: MAKE THE BUTTERFLIES

We carved out some butterfly forms from the colored fondant that was left over using our butterfly cutter. Despite not using all of them, we made around three of each color. However, it’s a good idea to keep extras on hand just in case.
The butterflies’ wings should be pointing up in a V form as we dried them. You can use the corner of a box to dry them, or you can improvise with whatever you have on hand. We used a skewer on a rolling pin and cling wrap that had been folded into a wedge. Or, as I did, you may fold some cardboard in half and squish it into a small container to create the “V-shape”. The butterflies were then placed away to dry and solidify.
Step 3: BAKING THE CAKE
For this recipe, we used a white chocolate mud cake. Mud cake is the best because it stacks incredibly beautifully and is wonderful and dense. You may prepare it ahead of time because it keeps for a very long time!
To create a four-layer cake, my friend created two mud cakes and cut each one in half. (We added buttercream between each layer in the following phase.) A magnificent tall cake is created by the layers. If you add some height, it looks much more polished.
The mud cake’s recipe can be found below. create sure to DOUBLE the quantity if you want to create TWO cakes, like we did. This recipe makes ONE cake.